Layout
This post is the second part in a series on detail mapping in Unity and clever ways to use it to create interesting materials:
- Part 1: General Concept
- Part 2: Detail Masking⇐ You Are Here
- Part 3: Upscale vs Downscale
- Part 4: Blending with Secondary Maps
- Part 5: Little Tricks
Detail Masking
In Unity, detail masking works by multiplying the alpha channel of a texture (known as the Detail Mask) against the detail diffuse map at each pixel on a surface, and combining the result with the primary diffuse map. So, if the mask has a value of 1.0 for a particular sample, the detail map is displayed in full at that sample. Likewise, a value of 0.5 will blend the detail diffuse at half intensity, and a value of 0.0 will apply no detail mapping at that sample. It’s important to note that the Detail Mask tiles at the same rate as the primary diffuse map, and only the alpha channel of a Detail Mask is used. This is actually good news, since it’s possible to pack your Detail Mask into your primary diffuse map’s alpha channel for opaque materials and just use the same texture for both slots.
One perfectly valid use for detail masking is to mask off areas where you don’t want detail mapping to occur. This is particularly useful if you are packing multiple different surface textures into an atlas, and want, say, your wooden parts to be grainy but not the metal parts.
But there’s a few other clever things you can do with detail masks as well. Check out this screenshot from the Unreal Tournament map CTF-CannonFodder2 by talented level designer Rachel Cordone:
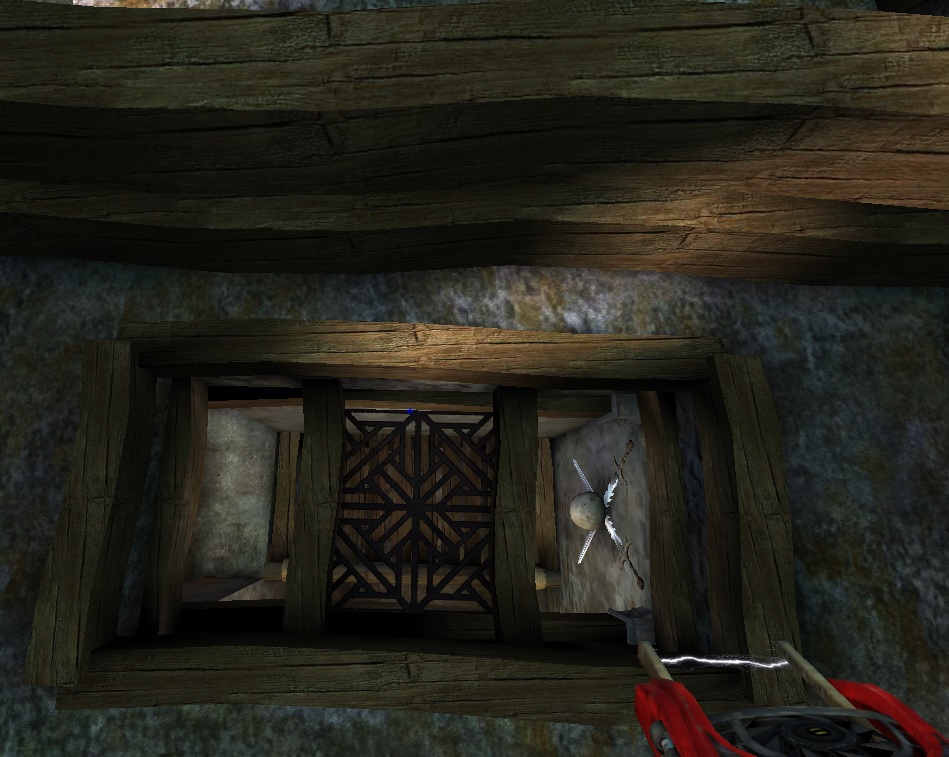 To put this in context, Unreal Tournament 2004 was released without any bump mapping/normal mapping capabilities. Detail mapping was the biggest luxury they had, and many players simply didn’t have the hardware to have detail mapping enabled in their graphics settings. In addition, UT2004 had no concept of detail masking. You either had a detail map everywhere on a material or you didn’t have one. Knowing this, Rachel created a wooden beam material where graininess was baked into the primary diffuse map, but only in some spots. The resulting wood had an aesthetically pleasing graininess to it that wasn’t overwhelming to the eye. It gave the viewer just enough grain to interpret the material as ‘rough’ without being noisy.
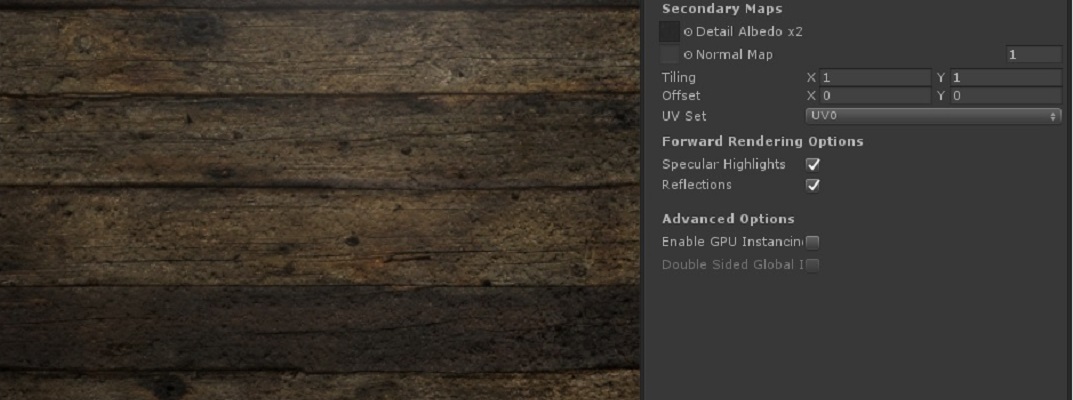
With Unity, we can do the same thing easily simply by applying a detail mask:
|
|
|
|
|
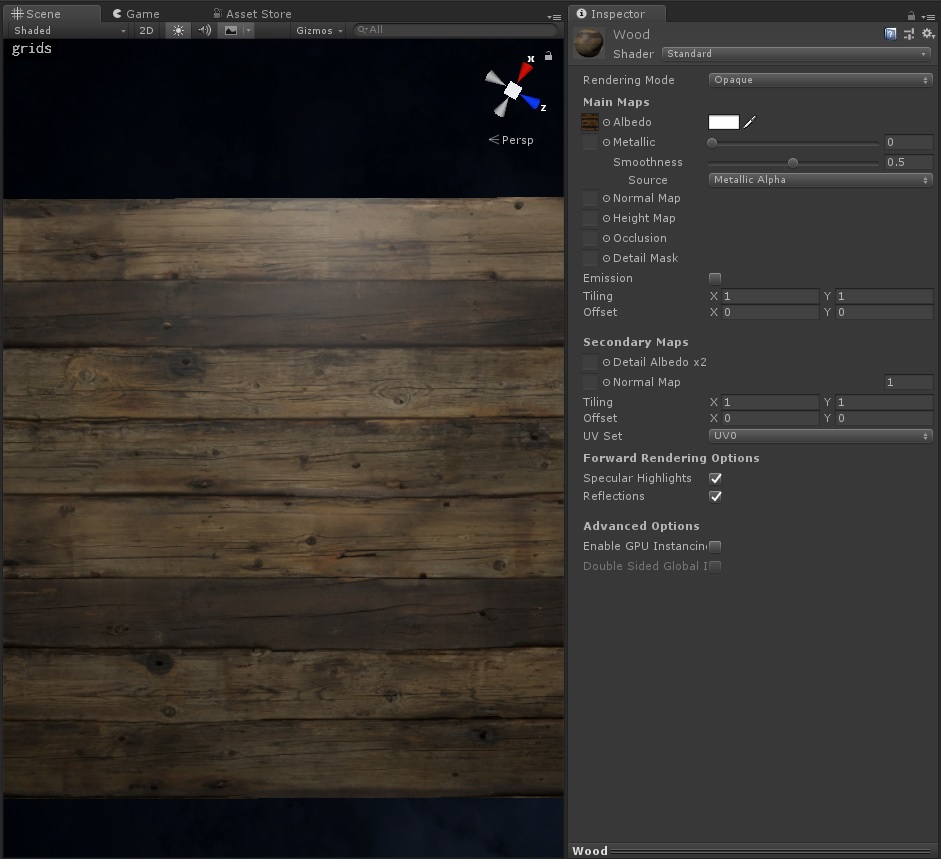
Primary diffuse map only |
Full, unmasked detail diffuse map |
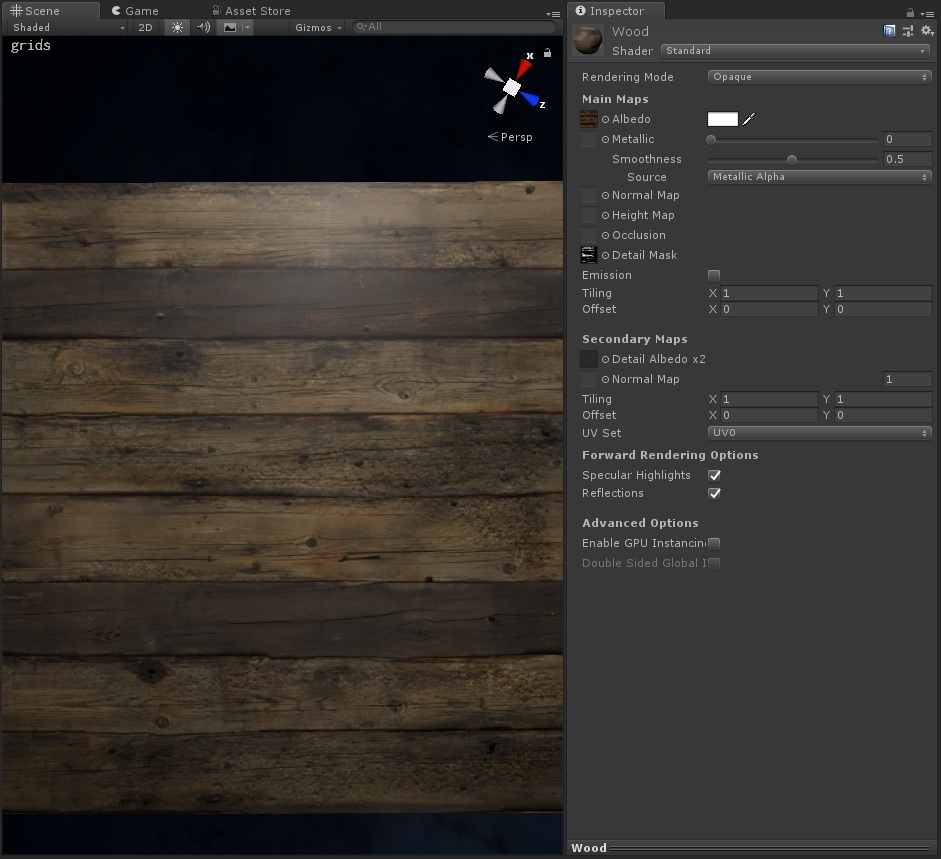
Detail diffuse with mask |

There are several advantages to doing this with a detail map/detail mask instead of baking the grain into the primary diffuse map:
- We can swap out shader variants for these materials at runtime, allowing the player to switch detail-mapping off to save VRAM and boost their framerate a little (although in practice, only potato-based videocards can’t handle detail mapping these days).
- The detail map can boost the texel-to-meter ratio of your materials without requiring larger textures. For instance, to add finer grain to a material with a primary diffuse map of 512×512 pixels, you could either switch to using a 1024×1024 pixel primary diffuse map, or you could add a secondary diffuse map of the same size (512×512) and set it to a higher tile factor. The mask itself doesn’t need a high texture resolution (64×64 will do just fine), and it has the added benefit of being single-channel. This gives you comparable texture detail without requiring you to ship 4K textures for everything. Additionally, you could easily get away with a handful of detail maps and masks. That way, you could mix and match detail maps and masks to create a large combination of materials without burning through a lot of VRAM.
- Your detail diffuse maps can be set to ‘Fade Out Mipmaps’, further alleviating the issue of detail maps making a surface look ‘busy’ from a distance. (More on this later.)
- Detail maps can be set to use a different UV channel than the primary diffuse map, offering interesting possibilities for animating them independently of the primary diffuse map.
Recent Comments